Support the Blog!

vudu.com

Saturday, May 28, 2011

Vintage Art With Vectors

Difficulty: Medium.  Recommend using a stylus for tracing.

I recently got married in Hawaii. Sure, I enjoyed the beach (and maybe too many Mai Tais) but I also enjoyed a lot of art. Down town Lahaina is crammed full of shops featuring local art and a surprising amount of celebrity art. Ronnie Woods is brilliant! But I found myself being inspired by the vintage prints placed throughout the resort.

I wanted to capture the vintage look in an iPad project and found that vector art worked great. So today I'm going to show you how to do your own vintage art using the iDraw app. Your finished piece will look something like this:



If you haven't all ready, you might want to check out my first blog on vectors where I go into detail on using the iDraw app before starting this one: http://flamingstylus.blogspot.com/2011/04/better-living-through-vectors.html.

Step 1: Create the Palm Trees
To start, we need to set the background color to red from the image settings menu.
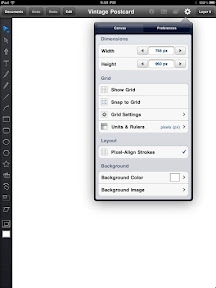


You will want to mute your colors in this project to give it a vintage look.
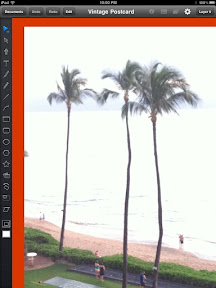


Next import an image of palm trees to use as a template. You can download the picture I used at this link: https://picasaweb.google.com/101992781047739709566/MyBlogPhotos#5611219019998840450.
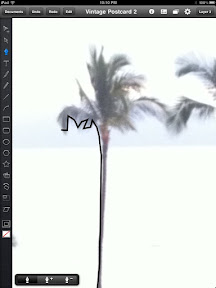


Use the Pen tool to trace a general outline of the palm trees point by point. Then set the object color to a muted black.
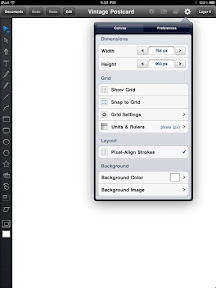


Tip: You can combine separate paths into one object using Union.

Use the pencil tool to add details to the palm tree. Once the palm tree is complete, set the outline to invisible. With the Pen tool, add a yellow line along the side of the palm tree.
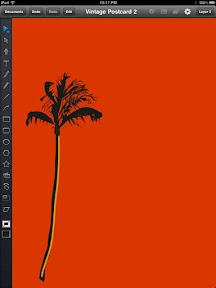


Set the layer to not visible and proceed to the next step.

Step 2: Create the Background Elements
For this project, we will use yellow accents to add depth and the feeling of motion.

I drew these in using the pencil tool selecting a muted yellow with a bit of orange as the fill. I set the outlines to transparent.
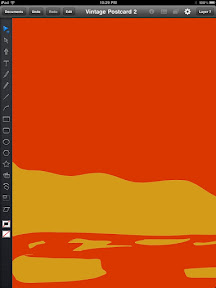


Now draw in a sun. Create horizontal bars using the line tool with the width set to 6. Use a muted white as the line color.
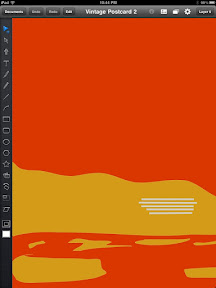


You see suns drawn this way in a lot of surf and skateboard art.
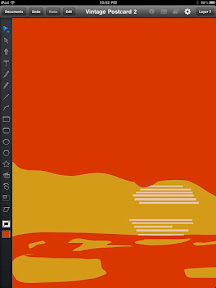


It doesn't have to be perfect. We'll cover up any imperfections with the next couple of elements like the stylized cloud below.

Using the Pen tool, create a shape stretching across the horizon allowing the background elements to peek through. Set it to the same color as the background.
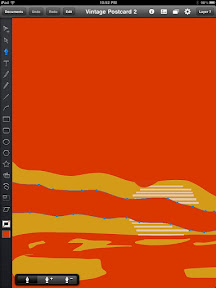


On a new layer, use the Pen tool to create islands along the horizon. Set the fill to a muted black and set the outline to transparent.
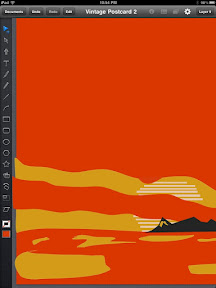


Draw in yellow highlights along the islands.
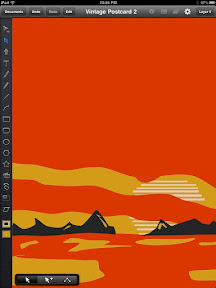


You can see all the elements coming together nicely now. Let's proceed with creating the foreground elements.

Step 3: Create the Foreground Elements
On a new layer, use the Pen tool to create grass shapes in the foreground. Set the fill to a muted black and the outline to transparent.
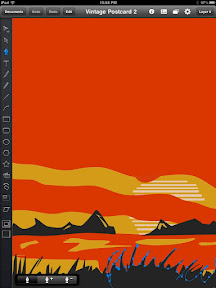


Now set the palm tree layer to visible and adjust any of the elements that might need lining up, adjust the order of layers, or adjust any colors to blend.
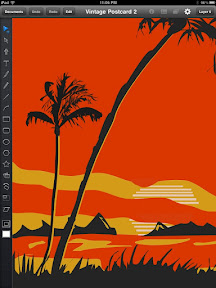


Now for the final touch, we will add a hula girl to complete our piece. On a new layer import a photo for reference.

I found the one below using Google image search with the term "Hula Girl." We will be just creating a silhouette from the image so don't get hung up on the image being perfect. You mainly want to capture the position of the hands and the texture of the grass skirt.
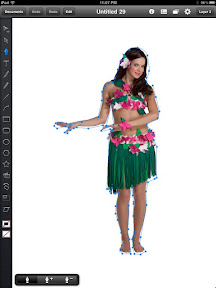


Using the Pen tool, trace an outline of the subject. Set the fill to black and the outline to transparent.
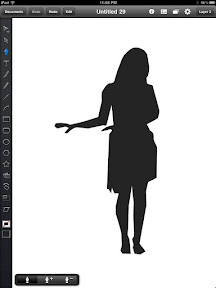


Now remove the photo reference and adjust the layers, placing the Hula Girl between the foreground and the background layers. Using the Pencil tool, draw in a crown of flowers to accent the girl. Set the fill to yellow and the outline to transparent.
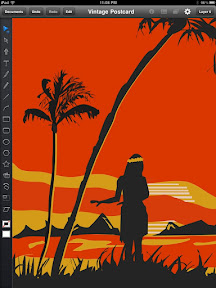


To give your image a poster look, you can add a title to your piece. I used the Optima Bold font with a shadow effect for the title below.
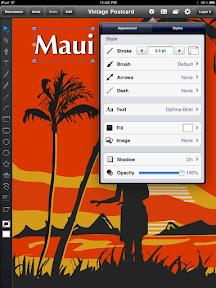

Your piece should be complete.


Export the image to Photo Gallery for sharing. I cropped my image further using Photogene to set it to poster dimensions.
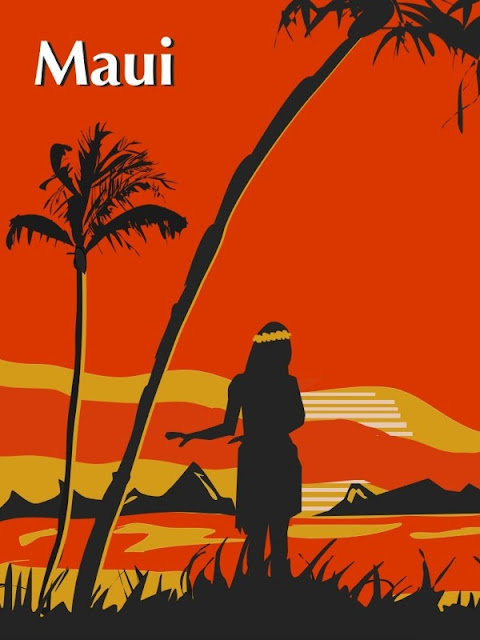


And that's it. Drop me a comment if you have any questions or just want to share your own artwork. Until next time, Aloha.
-Milo

Posted using BlogPress from my iPad

Products Used:


iDraw

Tuesday, May 17, 2011

Intro to Funk Box

In this video tutorial, I show you how to lay down beats with the Funk Box app.  Funk Box has a groovy, retro interface, that is loaded with features.  I crack a few of those features including customizing groove boxes and routing beats to other apps through virtual ports.  Enjoy!


Funk Box is available now at the Itunes App Store:
FunkBox Drum Machine - Synthetic Bits, LLC

Tuesday, May 3, 2011

Caricatures Made Easy

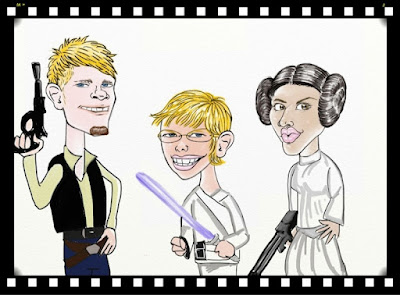
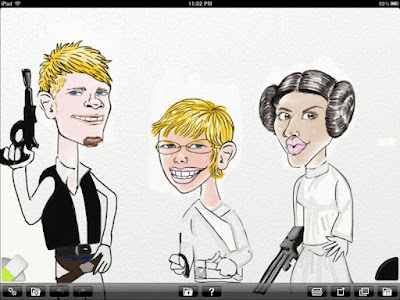
Let's face it, caricatures are cool. Being able to do your own is even cooler. Today I'm going to show you how to create your own caricature using Toon Face and ArtRage. The results will look great and you won't even have to make a trip to Six Flags.

The finished project will look something like this:

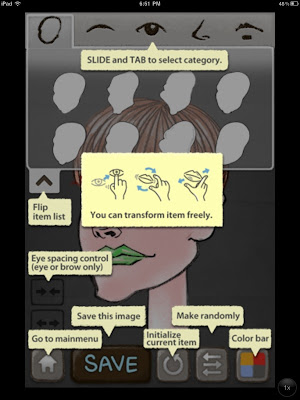
Don't be intimidated. This is a lot easier than it looks. We'll do all the heavy lifting in the Toon Face app. Toon Face is a fun app that let's you create caricature portraits simply by selecting pre-drawn features like eyes and noses. No art skills needed.

For this project we'll need to create three portraits in Toon Face and then use an art program like Art Rage to bring the portraits together and draw them bodies.

Getting Familiar With ToonFace
I looked at various apps like Toonpaint and PhotoCartoon to tackle this project. I even tried a few face-warping apps to enhance the cartoon effect but they didn't come close to the results I eventually achieved with Toonface.

What makes Toonface special is that it let's you use professionally drawn artwork to create your own caricatures. The other apps just apply a smoothing filter and some random outlines. That just won't cut it.

Toonface is easy to use to boot. First there is a built in help page to get you started. There is also a help file you can access from the main menu.

Here's a few tips for approaching this project:

-Slide the ribbon to the far left to access the Background tab. There are some nice textured backgrounds but you will want to use a solid background so that your portraits can be merged together later.

-Once you save, you are unable to edit the portrait again. So be sure you are satisfied with the results before you save.

-Find a good picture to work from. Pay close attention to the shape of the head. Getting the right shape for the head is half the battle.

-Don't get hung up on getting the perfect nose, mouth and hair. This is a caricature so things will be exaggerated. Choose the one element that best captures the essence of the subject and the rest will fall in place.

-If the portrait isn't coming together like you want, try adjusting the distance of the eyes from each other or the distance of the mouth to the nose. A little tweak can make a big difference.

Once you're done creating a portrait, save and export to the Photo Gallery. Create the remaining portraits before moving on to Art Rage.

Finishing Your Caricature
Art Rage is my favorite app to use whenever I want to replicate the look of traditional art. Watercolors, pastels, markers-you name it, Art Rage can do it.

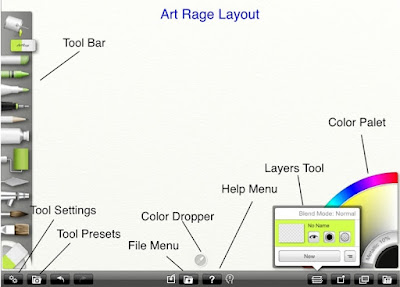
Use the image below to familiarize yourself with Art Rage's layout.


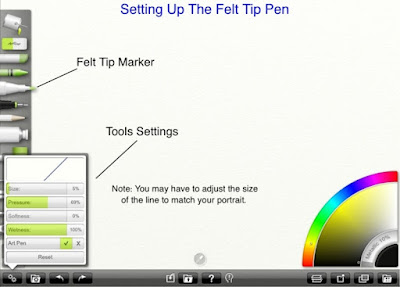
For our project, we will use the felt tip marker tool. You can see the settings I used in the image below.


Once you have your marker set up, you are ready to start importing the portraits from your iPad's Photo Album.

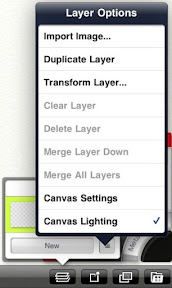
From the layers tool, tap Import Image from the popup menu located in the lower right corner of the layers tool.


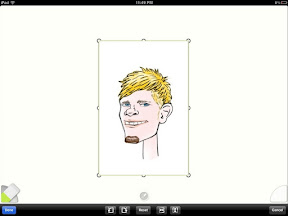
Select your first portrait from the Photo Album. Your image will appear in Art Rage with additional tools to rotate and flip your portrait. Simple tap and drag to move the portrait. You can also pinch to resize the portrait to desired size.


Click the Done menu in the lower right corner to set the portrait and return to the Art Rage workspace screen.

Repeat the import process until you have the portraits all loaded and in place.

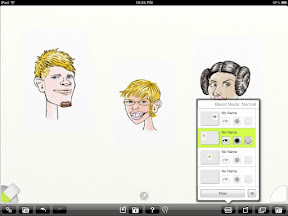
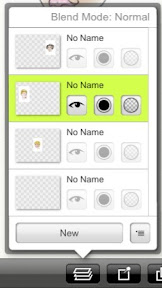
It will appear as if you have just one unified image now. But If you click the Layers tool, you will see that you have a separate layer now for each imported image.


You can move between the layers by selecting the layer you want to edit. Tap the layer at the top to select it.

Now create a new layer by clicking the New button from the popup menu located at the bottom center of the Layers tool.


The new layer should appear at the top. This will be the layer we will draw the bodies on.

Begin drawing in the bodies with the felt tip marker tool on the top layer using the pallet on the right to change colors when needed.


Here's a few tips for rendering the bodies
-Adjust the line width on the marker to match the line width of the portraits to give the picture a unified look.

-Don't get hung up on the bodies being perfect. Just make sure the bodies are smaller in proportion to the heads in order to pull off the caricature look.

-You can match the pallet to the skin tones in the portraits simply by tapping the color dropper tool to the portraits.

-Save often! When done you can export your art to the Photo Gallery.

-Use a photo editor App like Photogene to crop the picture and add a border.

Congratulations! You now have a finished caricature you can share with friends and family.  Drop a comment if you have any questions or just want to show off your own artwork.

Apps Mentioned

Saturday, April 30, 2011

ipad and iPhone together again via Midi

In today's tutorial, I show you how to share a Midi connection between your iPhone and iPad allowing you to play Nanostudio or Music Studio on the iPhone using Soundprism on the iPad.


Build your own Midi link:


Apps Mentioned:

Tuesday, April 26, 2011

The iPad & iPhone: Together at Last

The iPad is supposed to free us from desktops, right? So one of my goals with the iPad is to pull off projects without ever having to touch my Macbook. This is a bit harder with music projects but it can be done. This is where the iPhone comes in handy.

The iPhone really complements the iPad on music projects. Often times I want to use one app to play an instrument but use another app as a sequencer. Because let's face it, even the best instruments have pretty basic recorders.

Problem solved. I use the iPhone to play Thumbjam, iShred, or Guitarstudio and use the iPad to record with GarageBand, Studio HD or Nanostudio. This is easily facilitated with the iRig adaptor and 1/4" to 1/8" Stereo Adapter.

Not only can I now record and edit with GarageBand, I can also use it's amps and effects on the signal from the iPhone. See there, no desktop needed. In the next blog, I'll show you how to connect your iPhone and iPad via Midi. Have fun kids!

Items Mentioned:


- Posted using BlogPress from my iPad

Saturday, April 23, 2011

Songwriting on the iPad

     
Difficulty: Easy Peasy
Hassle: About as little as you can have on the iPad

Every kick-ass song must have kick-ass chords. The Beatles knew this, the Stones knew it and now you know it. As a lad, little Paul McCartney would even ride a bus across town just to learn a new chord. But of course Paul McCartney didn't have an iPad...or very protective parents for that matter.

The iPad is a songwriter's dream and not just because you can record a song without dealing with spastic drummers. With the iPad, you have all the chords in the universe right at your fingertips.

But it doesn't have to be complicated. Apps like iShred and Pianostudio can streamline the songwriting process if you know just a few chord basics.

In popular music, there are just a handful of keys that are commonly played (E, A, D, C, and G) with just two basic modes for each key: Major and Minor.

Major is the bright, happy, Tigger mode while minor is the brooding, darker, Eeyore mode. While most songs will have elements of Major and Minor, it is enough to know that the E Major key is a happier sounding key than its cousin key of E Minor.

Each key is a family with a set of 7 basic chords. There are other chords in the extended family but we will just focus on the chords in the immediate family.

Finding Chords
Yes, there's an App for that. My favorite App for finding the chords in a key is appropriately named the Key Chords App.


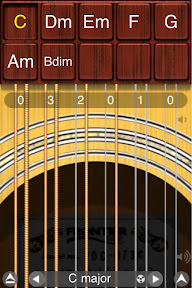
Just select the key from the side and toggle either Major or Minor and you get a list of chords. The chords in the immediate family will be on the first row.

If you select C for instance you will get the following chord sequence:

I Chord: C Major
II Chord: D Minor
III Chord: E Minor
IV Chord: F Major
V Chord: G Major
VI Chord: A Minor
VII Chord: B Diminished

Click on any of the chords to hear them played. You can even create and play a chord sequence by dragging chords to the bottom bar.

Alternatively, you can find chords using a website like:

http://www.guitar-chords.org.uk/chordskey.html

You simply pick a key from the side bar and it will give you the list of chords in the selected key.

Now that you know what the common keys are and how to find the chords for each key, let's load up some chords in your favorite iPad apps.

Creating Song Templates on iShred and Guitarstudio Apps
These sibling apps are identical except that iShred generates electric guitar sounds while Guitarstudio generates acoustic guitar sounds.

To make the most use of these apps for songwriting, we will need to create songs. But instead of creating ordinary songs, we will create "templates" in each of the common keys using the seven chords that make up the key.

In iShred and Guitarstudio, setting up chords is fairly straightforward.
1. Create a new song by tapping the "New Song" menu item on the left hand menu.
2. You can then tap the name and change the song name to something like "C Major."
3. You will then populate the buttons with the chords from your key using the slide selector at the bottom. I recommend putting the chords in sequential order.
4. When you are finished with setting up the chords in the song, touch the "Save song and exit" item from the right hand menu.

Create additional songs for the other popular Major and Minor keys. When you're done, you should have several songs that look like these:


Creating Songs in Pianostudio
Navigating in Pianostudio isn't as intuitive as the Guitar apps are. You have to hold down the button in the top left corner in order to display the pop-up menu menu items.

1. Create a new song by tapping the "Songs" menu item on the righthand menu. Then select "New Song" from the Songs menu.
2. You can then set the song name to something like "C Major" and then tap the "Done" button.
3. Now tap "Editor" from the popup menu. Then tap the "Chords" button at the bottom to access the chord selection screen. You will then populate the buttons with the chords from your key. Be sure to place the chords in sequential order.
4. When you are finished with setting up the chords in the song, touch the "Done" button at the top right of the screen.

Your screen should look something like this:


Using the Song Templates
Congratulations! Now that you have the song templates set up, writing songs is as easy as I-IV-V. Experiment with creating chord progressions in the different keys. Study the chord progressions of your favorite songs or use an App like Chord Bank Pro to find popular chord progressions.

If you are interested in learning more about chords and chord progressions, I recommend the books Chords and Progressions For Rock Guitar and How to Write Songs on Guitar:

Chords & Progressions For Rock Guitar (Guitar Books)    How To Write Songs On Guitar - Revised


Now go be Awesome!

Apps Mentioned:


- Posted using BlogPress from my iPad